

If you’re curious about a straightforward method to safely remove an SD card from your MacBook, Finder offers a convenient option. This process is particularly handy if your SD cards don’t automatically appear on the desktop when inserted. Despite requiring a bit more effort, this method proves valuable when Finder is already open or when your SD cards seem elusive.
Table of Contents
- Simple Steps to Eject an SD Card using Finder:
- Importance of Ejecting:
- Why Eject Before Removal:
- FAQs:
- In Conclusion:
Simple Steps to Eject an SD Card using Finder:
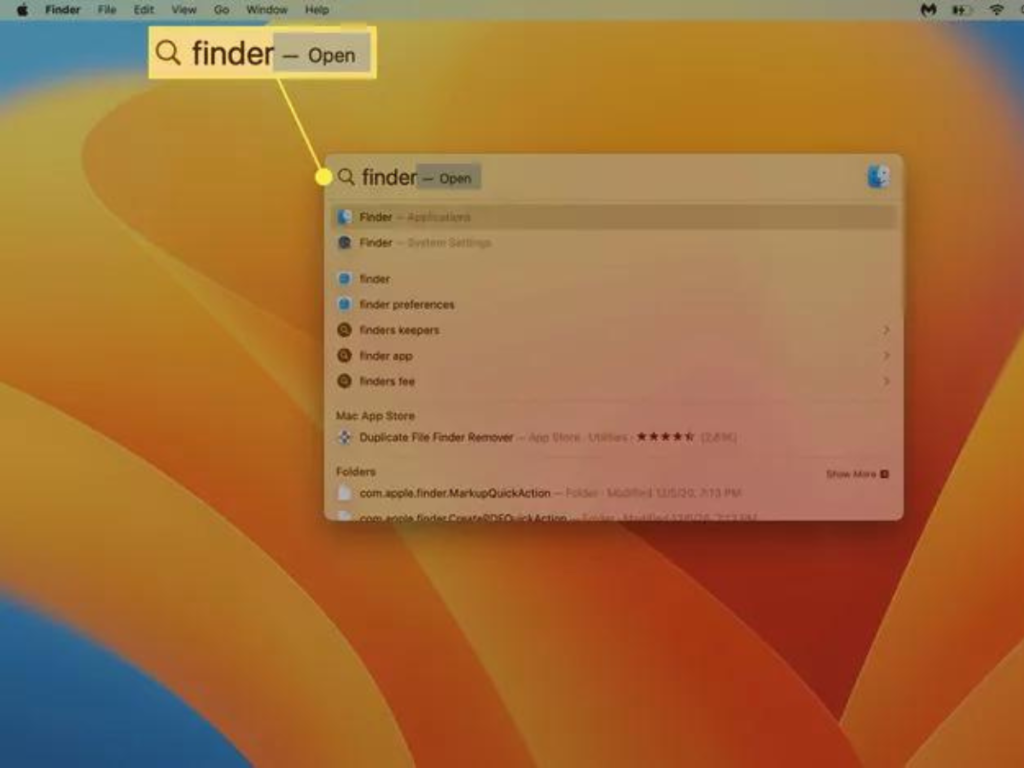
Step 1: Launch Finder
Begin by opening Finder on your MacBook. You can do this by either clicking on the Finder icon in your dock or using the Spotlight search feature.
Step 2: Locate the SD Card
In the Finder window and navigate to the “Locations” section in the Sidebar. There, you’ll find the SD card listed with its name.
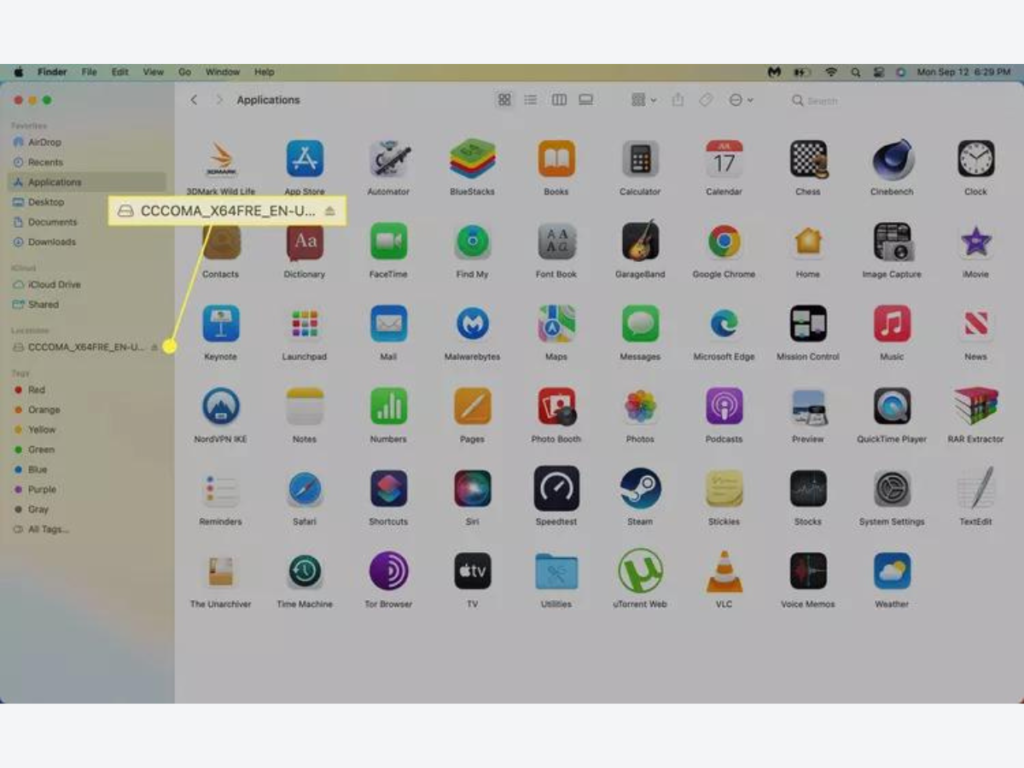
Step 3: Click the Eject Icon
Identify the SD card, and click on the Eject icon situated next to its name. This action initiates the unmounting process for the SD card.
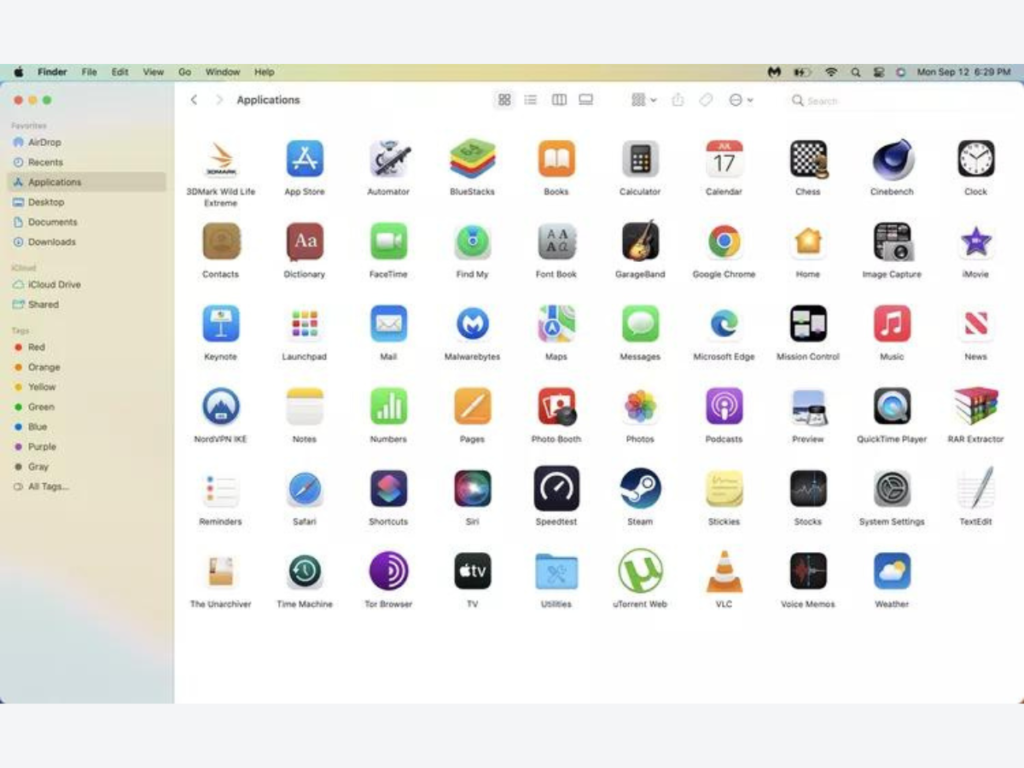
Step 4: Wait for Disappearance
Monitor the “Locations” section in Finder. Once the SD card disappears from this list, it’s safe to physically remove it from your MacBook.
Importance of Ejecting:
When you choose to eject an SD card using Finder, you ensure that your MacBook concludes any ongoing processes related to reading or writing data to the card. This precautionary step is essential for preventing potential data corruption.
Why Eject Before Removal:
- Data Integrity: Ejecting significantly reduces the risk of corrupting files on the SD card. Even if you haven’t accessed any files recently, macOS may have data queued for writing to the card. Removing it prematurely could lead to data loss and file corruption.
FAQs:
Q1: Can I remove the SD card without ejecting it?
A1: While physically removing the SD card without ejecting is technically possible, it’s safer to eject it first. This helps in preventing potential data loss and file corruption.
Q2: What if the SD card doesn’t appear in Finder?
A2: If your SD card doesn’t show up in Finder, check your connections and consider restarting Finder or your MacBook. If the issue persists, explore alternative methods like using the terminal or Disk Utility for ejection.
In Conclusion:
Ejecting an SD card through Finder is a simple yet critical step that contributes to data integrity and prevents corruption. This brief additional step ensures the safety of your files and maintains the overall health of your SD card.
In summary, by following these four straightforward steps—opening Finder, locating the SD card, clicking the Eject icon and waiting for it to disappear—you not only protect your data but also contribute to the reliable performance of your storage devices.
Remember: Taking a few extra seconds to safely eject your SD card can save you from potential issues down the road. Empower your MacBook experience by incorporating this simple yet impactful practice into your routine.